Installation
You can do it in two ways:
FTP Upload
- Download the "All files & documentation" from your Themeforest account, "Downloads" section
- Unzip the "clapat-main.zip" file or whatever the name of the downloaded archive is.
- Select the "clapat" folder which represents the Wordpress theme folder. It's important to extract this folder and not the main archive!
- Open up your FTP manager and connect to your hosting
- Browse to wp-content/themes
- Upload the "clapat" folder mentioned in the third step above
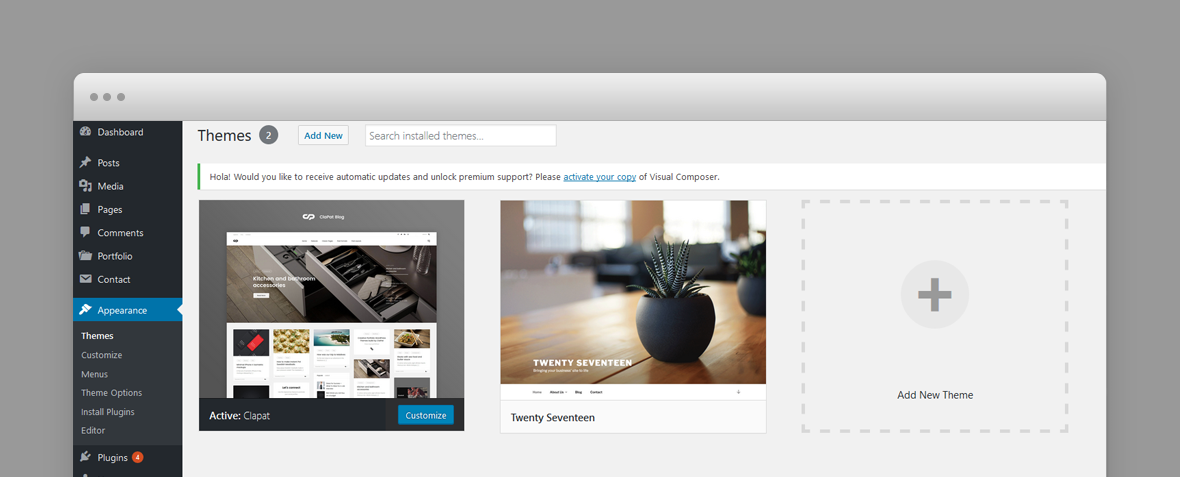
- Log Into WordPress and go to Appearance » Themes
- Find Clapat and click
Wordpress Upload
- Download the "Installable WordPress file only" from your Themeforest account, "Downloads" section
- Navigate to Appearance » Add New Themes » Upload
- Select the downloaded theme file "clapat.zip"
- Hit button and the theme will be uploaded and installed
Once the theme is uploaded, you need to activate it. Go to Appearance » Themes and activate Clapat theme.
Plugins Installation
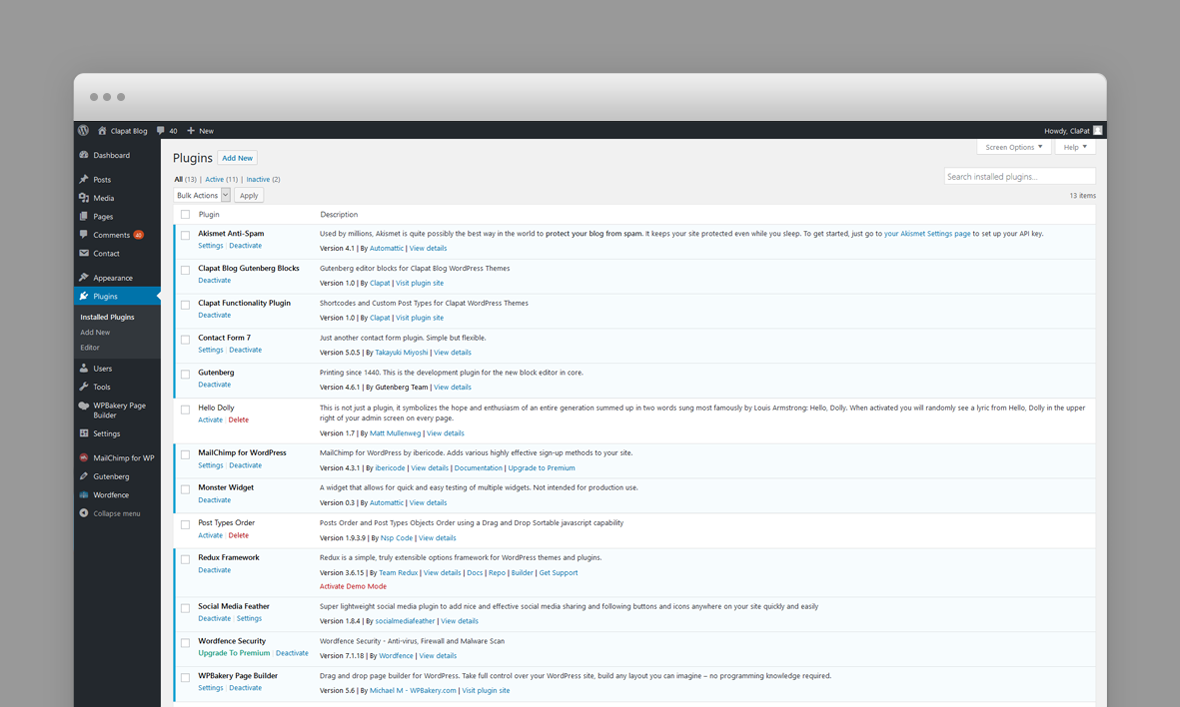
If installation was successful, you'll see a notice about required plugins for Clapat, to proceed click "Begin installing plugins".
You'll see a list of plugins, select them all and choose Install and then hit button. If everything will go OK, you should see them in Plugins » Installed Plugins list in wp-admin and you should activate all the new plugins.
Activating Theme Options
After activating the theme and installing Redux Framework plugin, you will notice under Appearance menu new submenu Theme Options. You'll find there Theme Options Panel, from where you can do a lot of cool stuff. Every section of Theme Options Panel will be described later.
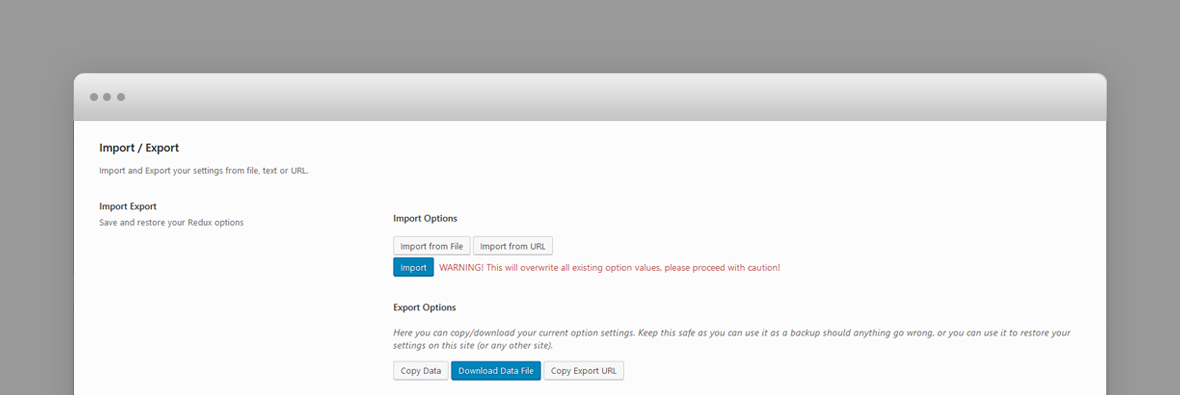
If you want to have the same theme options as Live Preview, go to theme package folder, demo-data folder, select one of the demo folders you wish to import the data from and open the options file ( theme_options_demo.txt )
Select and copy the file content. After that go to Appearance » Theme Options » Import / Export and paste it to Import Options - Import From File.
Press and afterwards press
Importing Demo Content
If you want to have the same content on your website as Live Preview of Clapat theme, you'll need to import demo content.
To do that please go to Tools » Import » WordPress, install wordpress importer plugin if necessary and go to main theme package folder, demo-data folder, select one of the demo folders you wish to import the data from and open the import file ( import.xml ) and proceed importing the file.
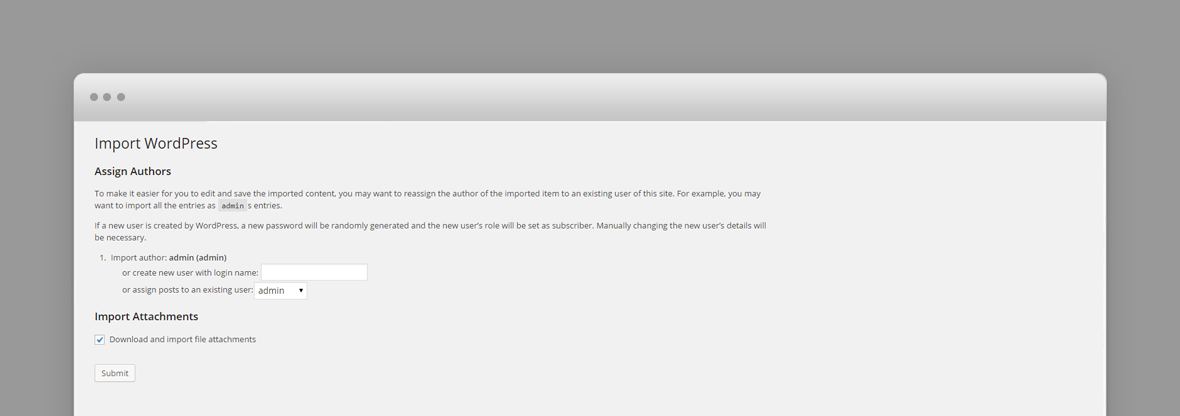
Please make sure you check Download and import file attachments before you click
After the content was succesfully imported, you may need to setup the site menu.
Some photos included with import file are blank since they are used only for demo and we do not have distribution rights for them.
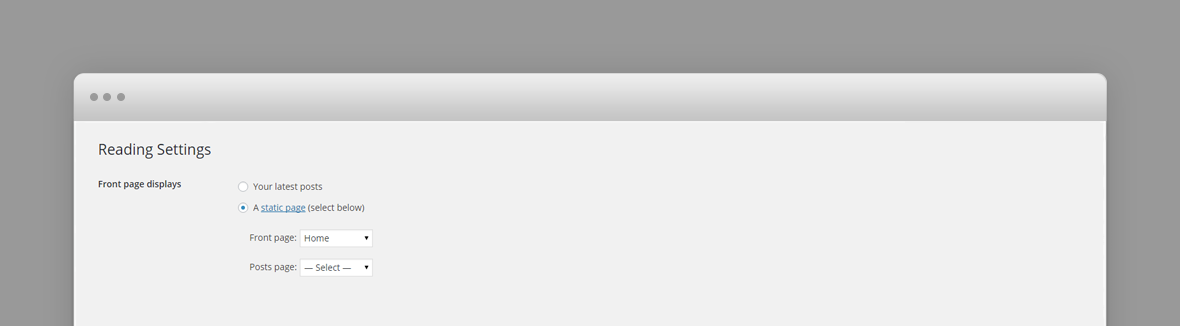
Setting up the front page
Go to Settings » Reading, and select the front page you wish to have for your website.
The front page on our demo site is Blog - Parallax Slider
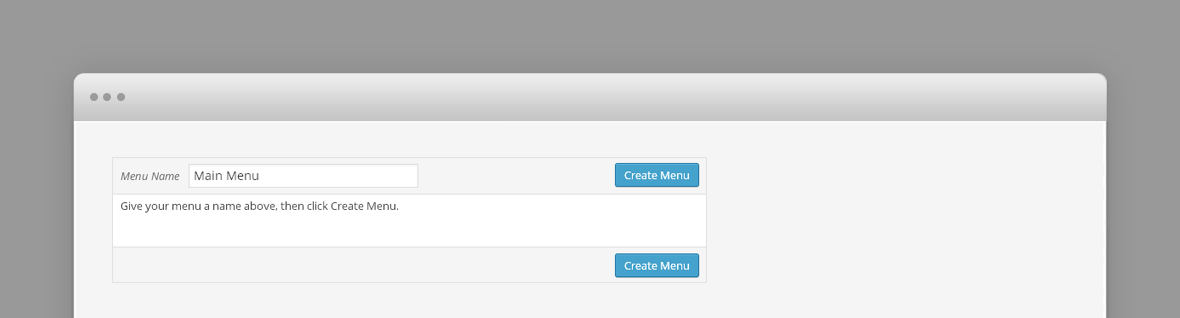
Setting up the menu
Go to Appearance » Menus, and make sure you have at least two menus created and set them as 'Primary Menu' and 'Secondary Menu'. If you have multiple menus Clapat will pick the first one. If you have no menu created, go ahead and create one.
Configuring Contact Form 7 plugin
Our theme requires contact form 7 plugin for contact form. After installing it, go to Contact » Add new (or edit current one) and in Form field paste what's below:
[submit "Submit"]
Then at the top of page you'll see the shortcode, for example:
[contact-form-7 id="836" title="Contact form 1"]
Redux Options Framework plugin
This plugin is a must. Without it, you will not have access to a comprehensive set of theme and page options.