Created: 01/04/2013 - By: ClaPat Studio -
Contact Us
Thank you for purchasing this theme. If you have any questions please feel free to contact us via e-mail: fgpatrick2002@gmail.com.
Thanks so much, and please rate this theme!
Welcome To Eleven Theme Documentation
Theme features:
- Parralax Background animation
- Layer SLIDER Wordpress Plugin
- Drag an drop section layout
- True one page theme with blog
- Responsive HTML5 and CSS3 design
- Unlimited Colors
- Admin Theme Option
- Sortable full screen portfolio
- Animated Testimonials
- Blog in caroussel with multitouch sliding
- Full width video
- Ajax load outside content for blog post and portfolio project
- 5 First section layouts possible with different sliders
- Custom Post Types
- Custom Shortcodes
- Isotope portfolio styles and hover effect on project image
- Video support for portfolio
- Animated portfolio filter
- Slide up/down effect on team image
- Animated Scroll to Top
- Responsive drop-down navigation
- Full width map on contact page and custom marker
- Color Box
- 500+ Google Fonts
- & much more...
Installing Theme
You can do it in two ways:
FTP Upload:
- Unzip the "eleven.zip"
- Log into your site via FTP
- Browse to wp-content / themes
- Upload the eleven-wp theme folder.
- Log Into Wordpress and go to Appearance - Themes
- Find the Eleven-wp and click activate
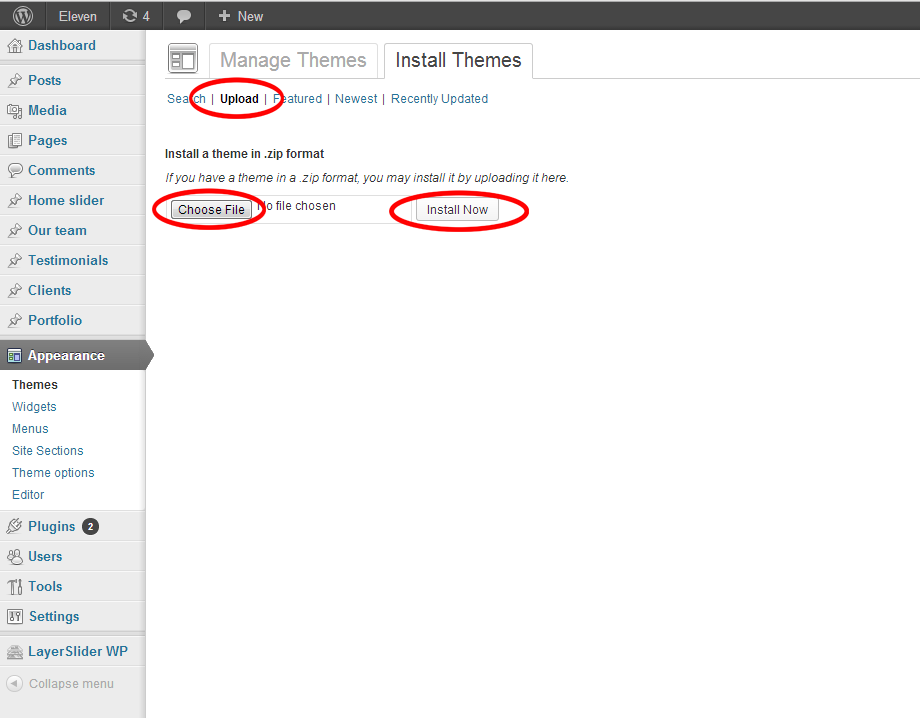
WordPress Upload:
- Unzip the "zip" file you've downloaded with theme, you'll find "eleven-wp.zip" inside.
- You need to change the attributes wp-content folder, and the subfolder themes.
- Navigate to Appearance > Add New Themes > Upload.
- Follow the instructions on the screen, select the zipped theme folder ("eleven-wp.zip").
- Hit Install Now and the theme will be uploaded and installed.
- Once the theme is uploaded, you need to activate it. Go to Appearance > Themes and activate your chosen theme.
Activating Theme Options
After activating the theme, you will notice under Appearance menu new submenu Theme Options. You'll find there Theme Options Panel, from where you can set your theme options.
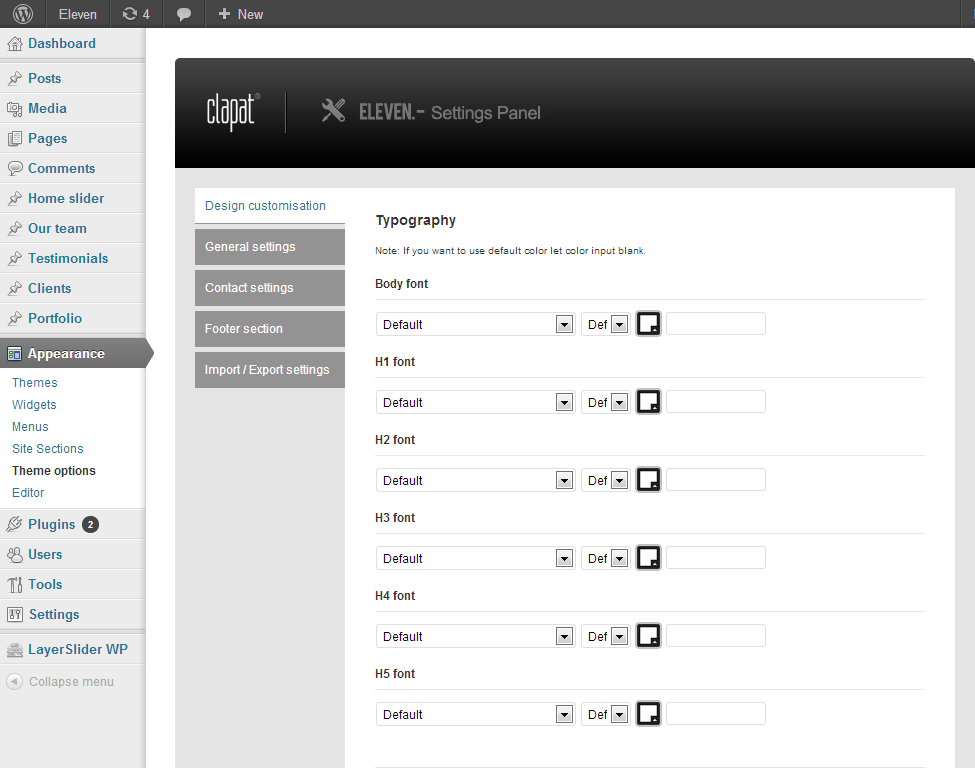
After you made you changes, don`t forget to hit the button Save Options
Note :
For using the custom skins, and fonts option, please modify the permission rights to folder "dynamic", to allow writting. This is necesary because of .css files that are generated - like skins, etc.
Skin option
On design customisation you have the posiblity to save a chosen combination of collor, as a skin. Choose the color combination you like, and click Save palette as new skin , and refresh page. You can save multiple skins an import and use them at anytime.
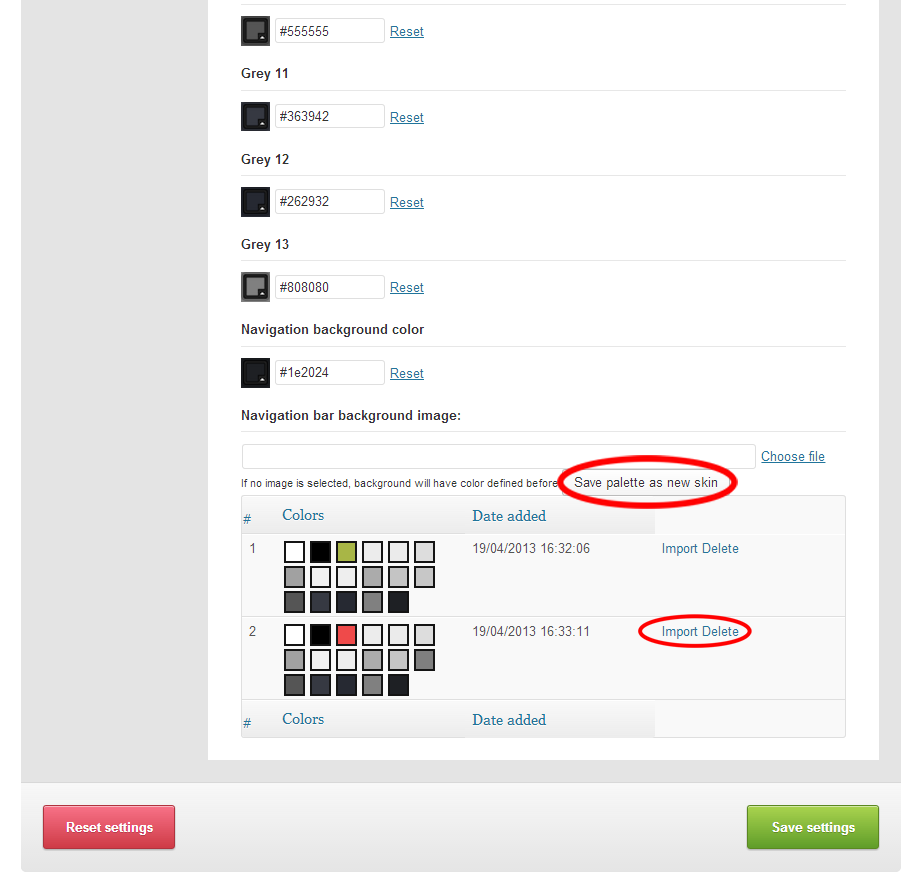
After you made you changes, don`t forget to hit the button Save Options
Header option
We tried to offer many option, for page header. Here are the possible combination which can be created by using shortcodes and option, from this section in admin pannel.

You can Disable home conent/slider , and you'll have menu on top, as a regular page.
You can use Don't show menu above home section, and you can create a Full height slider, and menu will be diplayed once you scroll down.
You can use - Full Width Slider by using [full slider] shortcode.
You can have - Full Width Video by using [youtube-video video="youtubelink"]
You can have - Parralax animated background by using this shortcodes [parallax image="http://yourbackgroundimage"] your html content displayed over background (you can use shortcodes too)[/parallax]
You can use - LayerSlider by using LayerSlider shortcode, use this in combination with auto height for home section, an this will automatically will be resized to LayerSlider height.
So to sume it up, here are the possible combination for header section.
- Menu on top, no slider
- Menu on top, slider (by using layer slider shortcode in first section)
- Full width slider, menu normal position
- Full width video, menu normal position
- Parallax background animation, menu normal position
- Parallax background animation, menu on top (no content on first section, only parallax background)
- Full width/height slider, no menu displayed.
- Auto height slider, with menu in normal position
and probably you cand find another combination yourself.
Site Section
After activating the theme, you will notice under Appearance menu new submenu Site Section. You'll find there site section pannel from where you can set up the way the you arange the section of theme. You can add / delete or re-arrange section by drag and drop. Also in the right side of the page you have the shortcode generator.
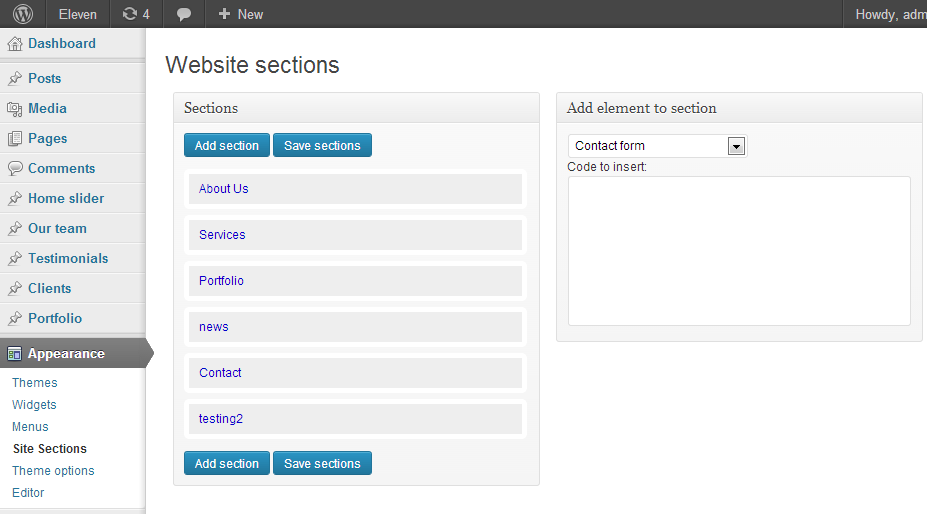
Understanding section
This in a one page theme with "parallax" animation, so the entire page is split in section, each section has some elements :
- Section ID : section id name, small characters only
- Section Name : this is the name on the section that will apear in navigation menu.
- Layout type : boxed, full width or current.
- Section content : here you can insert a page, html, shortcodes etc.
- Separator Background : the background image of separator which will be animated.
- Section Separator content : this content will come on top of separator background , you can insert html / shortcodes / etc
Tip. For inserting a whole page, in one of the section, u can use [page slug="your page slug"] - check this for a better explication of what is a page-slug.
The reason of this setup, is to allow user a greater flexibility in arranging, inserting, modifying content of theme. You can put content via shortcodes anywhere in the theme, including over parallax background.
After you made you changes, don`t forget to hit the button Save Options
Importing Demo Contet
If you want to have the same content on your website as Live Preview of Eleven theme, you'll need to import demo content.
You have to import first the theme option, by going to Appearnce > Theme Options > Import / Export settings , paste to content from demo file eleven-wp.txt, and click Import settings > Save settings.
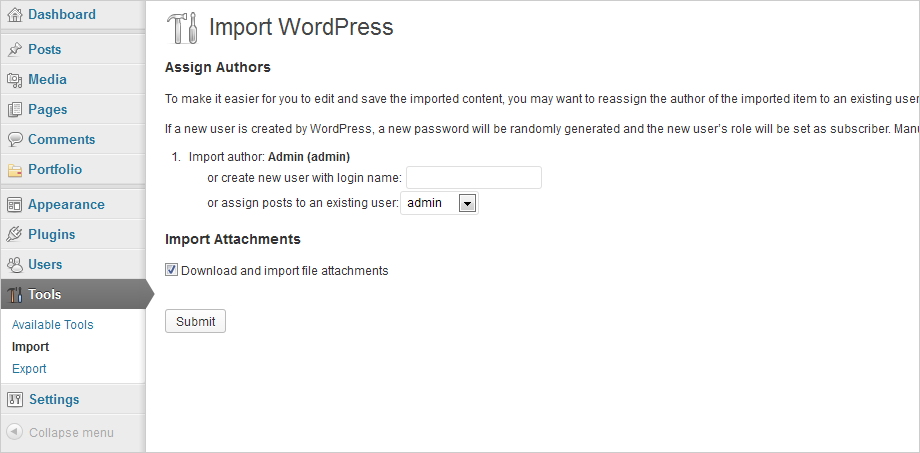
After that please go to Tools > Import > WordPress, install plugin you'll see and than select file "demo-content/demo-eleven.xml" from Theme Package (the unzipped file you've downloaded from ThemeForest after buying this theme).
Setting up the Header Menu
Because is a one page theme, you dont have to setup from wordpress pannel.. Each section you created in section editor, will be automatically added in header.
Setting up the static Home Page and the Blog Page
After you imported the demo content and set up the menus, you need to set the Home Page and the Blog Page, if you imported settings and demo files Go to Settings > Reading and in the Front page displays choose A static page, and choose Main as Front Page.
If you start with an empty content, create a page using Responsive as Template , and use it as a Front Page
Setting up Layerslider
The awesome Layerslider, is included in this theme to add some amazing slider effects. Before use it you have to do the following steps. :
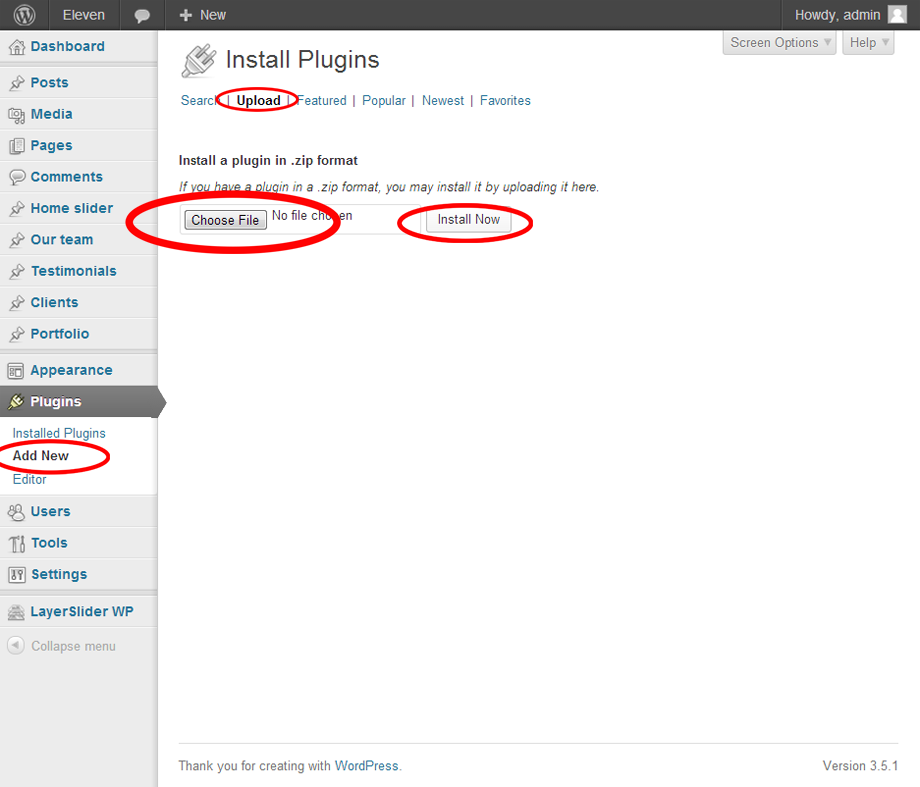
- Hover over the Plugins menu item on your left sidebar in your WordPress admin area and select "Add New".
- In the new page click on the "Upload" menu item on top of the page.
- Choose the "layersliderwp-4.1.1.installable.zip" file that you extracted from the downloaded package and click "Install Now".
- WordPress may ask you to type your FTP login credentials to install the plugin. Click on "Proceed" when you finished.
- The plugin is now installed, click on the "Activate Plugin" button.
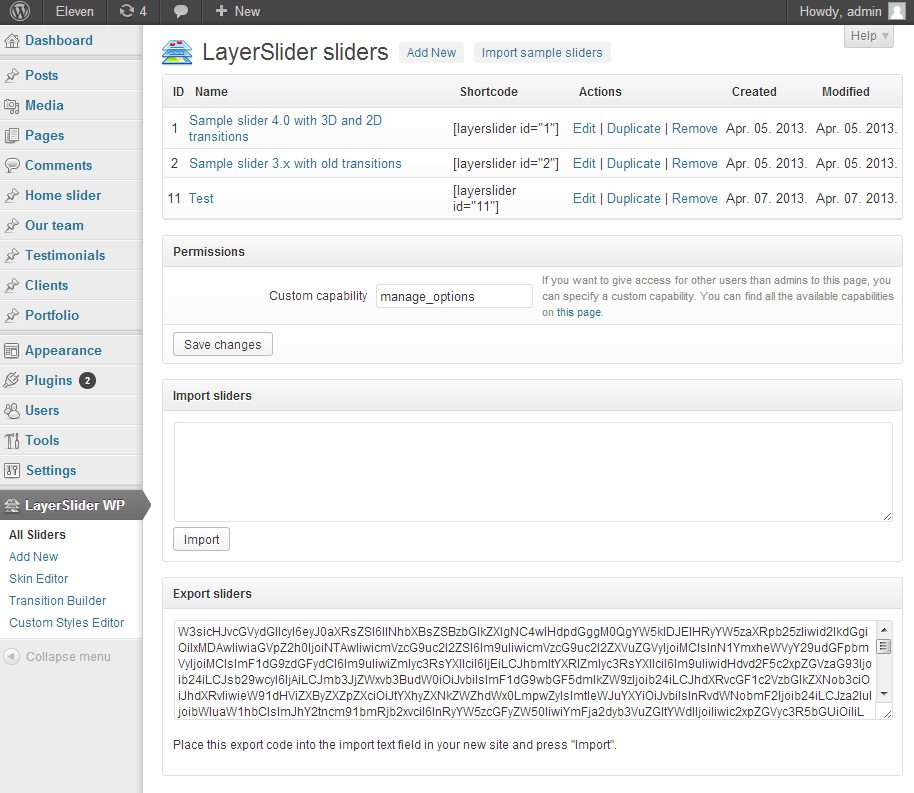
After you installed the plugin ,you can place a slider any place you want by using the LayerSlider shortcode as in screenshoot.
To create advance slider, have a look on the documentation, prodivded here, or follow the tutorial on youtube :
http://www.youtube.com/watch?v=ZY9SxVyugx4
Setting up Home Slider
Home Slider is created by using Custom Post Types, you define each slide by going to HomeSlider > AddNew
Here you can insert title, text, and featured images, each custom post represent a slide.
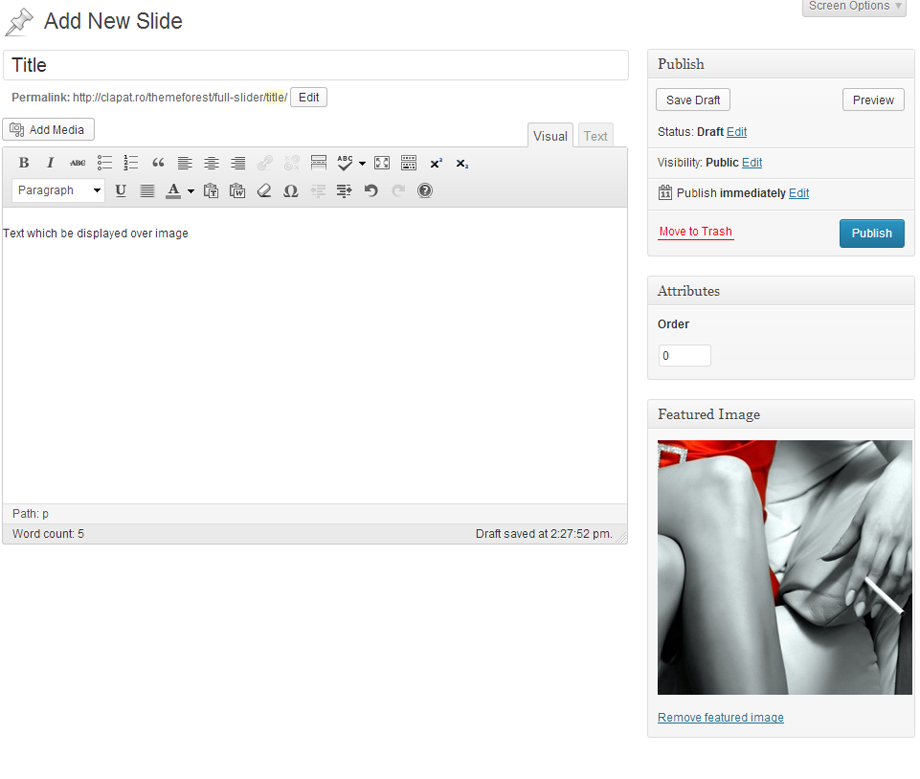
The shortcode for Home Slider is [full-slider]
Portfolio
The Portfolio is build by using Custom Post Types, and works on the same principle. You can use 1 featured image, or upload more images , and then you will have a slideshow. Also The images, can be rearranged by drag and drop.
You can also insert youtube videos.
The shortcode for Portfolio is [portfolio title="Your Title"]
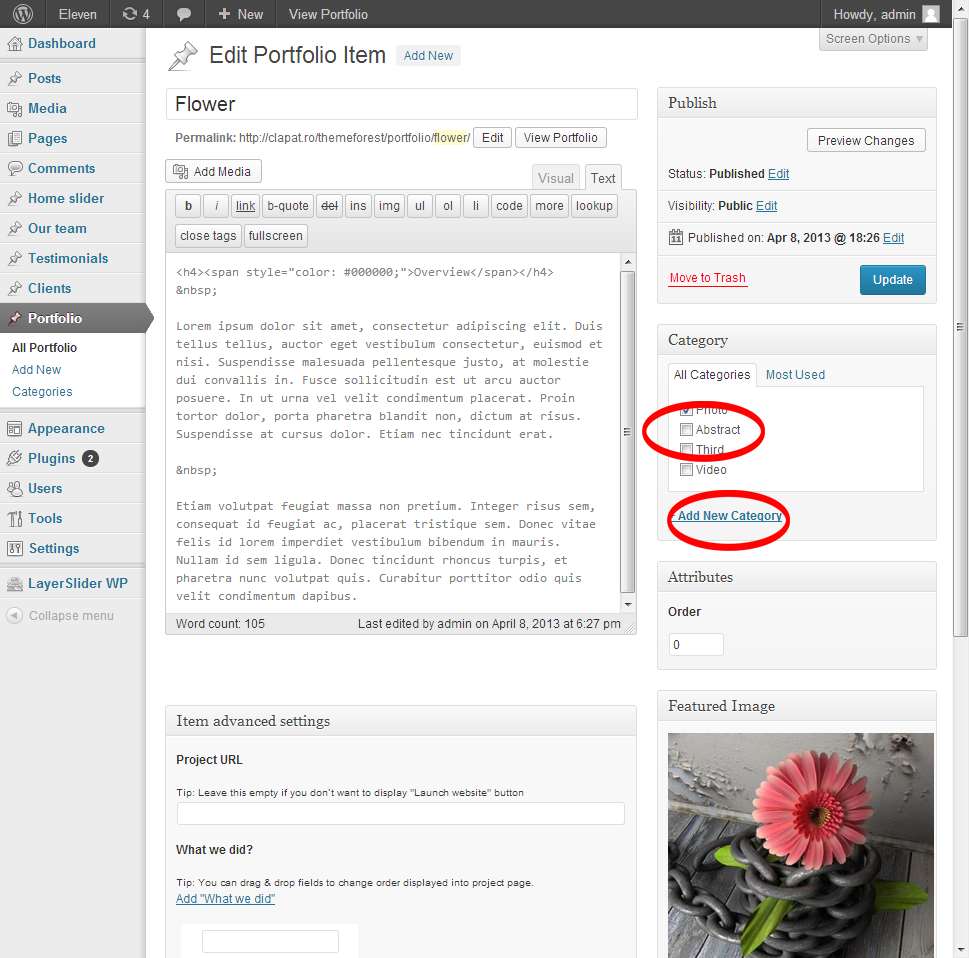
You can categorize your Portfolio items by using the existing categories, or adding new one. Also if you fill the Project URL input field with an adress, a Launch website button will be displayed which links to that URL
Testimonials
You can add testimonials by going to Testimonial Menu on left sidebar.
The testimonial will be displayed as a slideshow.
Use this shortcode to place it where you need it. [testimonial-slider]
Clients
You can add featured clients by going to Clients Menu on left sidebar.
Here you can upload a logo, and place a link for each client.
Use this shortcode to place it where you need it. [clients]
Our Team
You can add featured team member by going to Our Team Menu on left sidebar.
Here you can upload a picture, add social links and description for each team member.
Use this shortcode to place it where you need it. [our-team]
Shortcodes
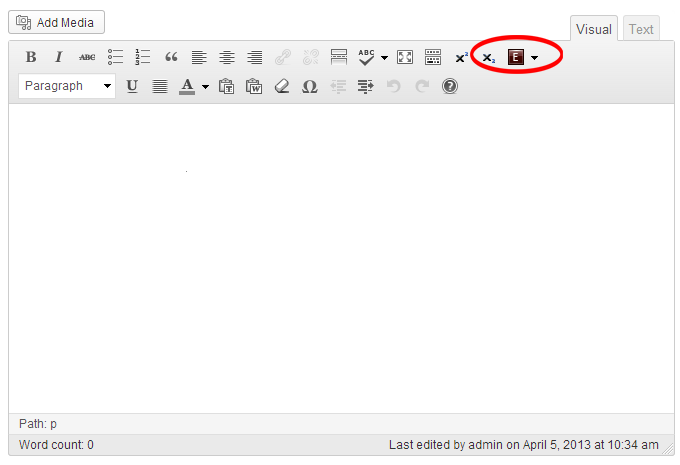
Create a page or edit one. To use the shortcodes, you'll need to change the editor Visual in Text.
The most imporant pages were created with the shortcodes.
After that you will find a drop down see image below. Here you will find all the shortcodes. Just choose one and after edit how do you want.
Scripts
This theme use 15 Script files:
- Carousel Slider
- Isotope
- ColorBox
- Flexslider by WooThemes
- Jigowatt Contact Form
- Max image2
- Simple Tabs
- MB-ytplayer
- Parallax Effect
- Scroll To
- Sticky Navigation
- Custom google map
- Progress bar
- Touch device support
Icons
We used icons for this theme from:
Fonts
We used this font
Images
Personal images used in demo, and for demo content themeforest assets library.
Thank you...
Once again, thank you so much for purchasing this theme. As I said at the beginning, I'd be glad to help you if you have any questions relating to this theme. Just contact me via email at fgpatrick2002@gmail.com. Please rate this theme!